Quick Start
This short walkthrough gets you from signing in to doing real work in DocLock: land on your dashboard, open a workspace, open or upload a document, and find things with search. Each step uses the actual screens you'll use every day.
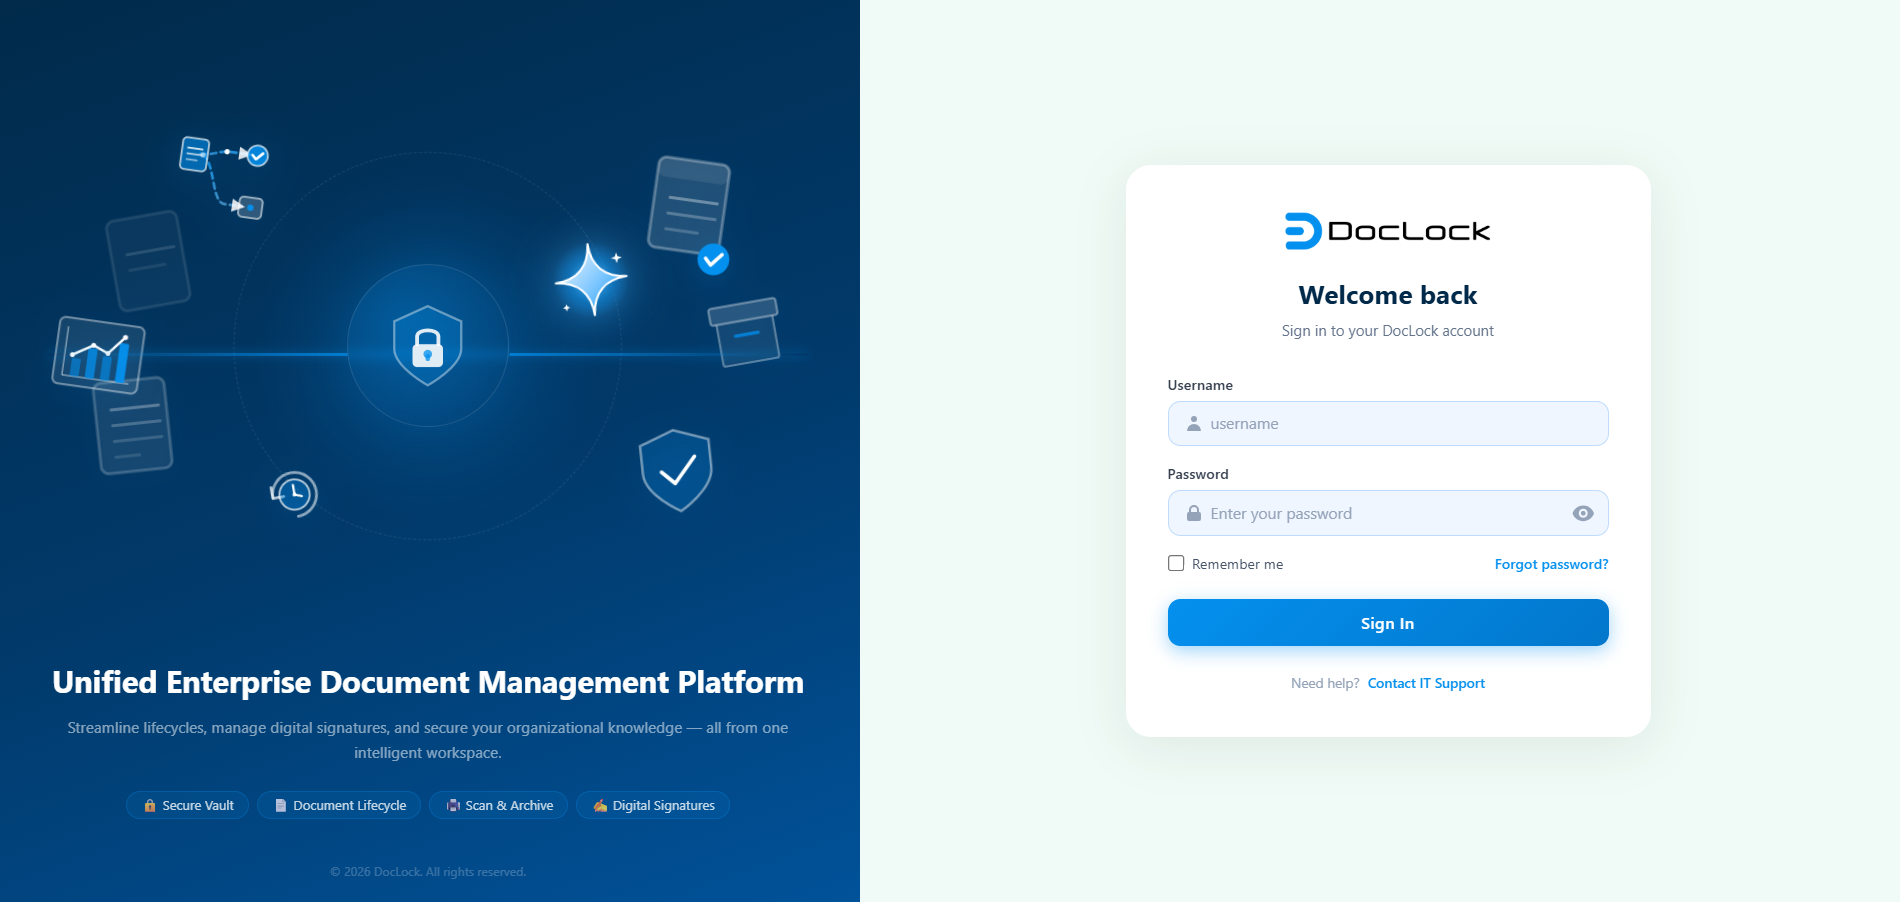
1. Sign in
- Open DocLock in your web browser using the address your administrator gave you.
- On the Sign in screen, enter your username or email and your password.
- Click Sign in.
Tip: You can tick Remember me to stay signed in on a trusted device, and use the eye icon to reveal your password while typing.
After a moment you're taken straight to your Home dashboard.
Note: A DocLock session lasts about 8 hours. After that you'll be asked to sign in again.
2. Land on your dashboard
The Home dashboard is your starting point. It greets you by name and shows cards, charts, quick actions, and tasks that match your role — so an executive, a knowledge worker, and an administrator each see a different layout.

From here you can:
- Use the quick action shortcuts to jump to common tasks.
- Click a KPI card (e.g. My Documents, Pending Approvals) to open the matching list.
- Return to Home any time by clicking the DocLock logo (top-left) or Home in the menu.
3. Open a workspace
Documents live inside workspaces. To open one:
- In the left menu, open Document Explorer → Workspaces (or Workspaces & Vaults → All Workspaces).
- You'll see a grid of workspace cards. Click any card to go inside.
- Inside, you can browse folders and files, see recent Activity, and view who the Members are.
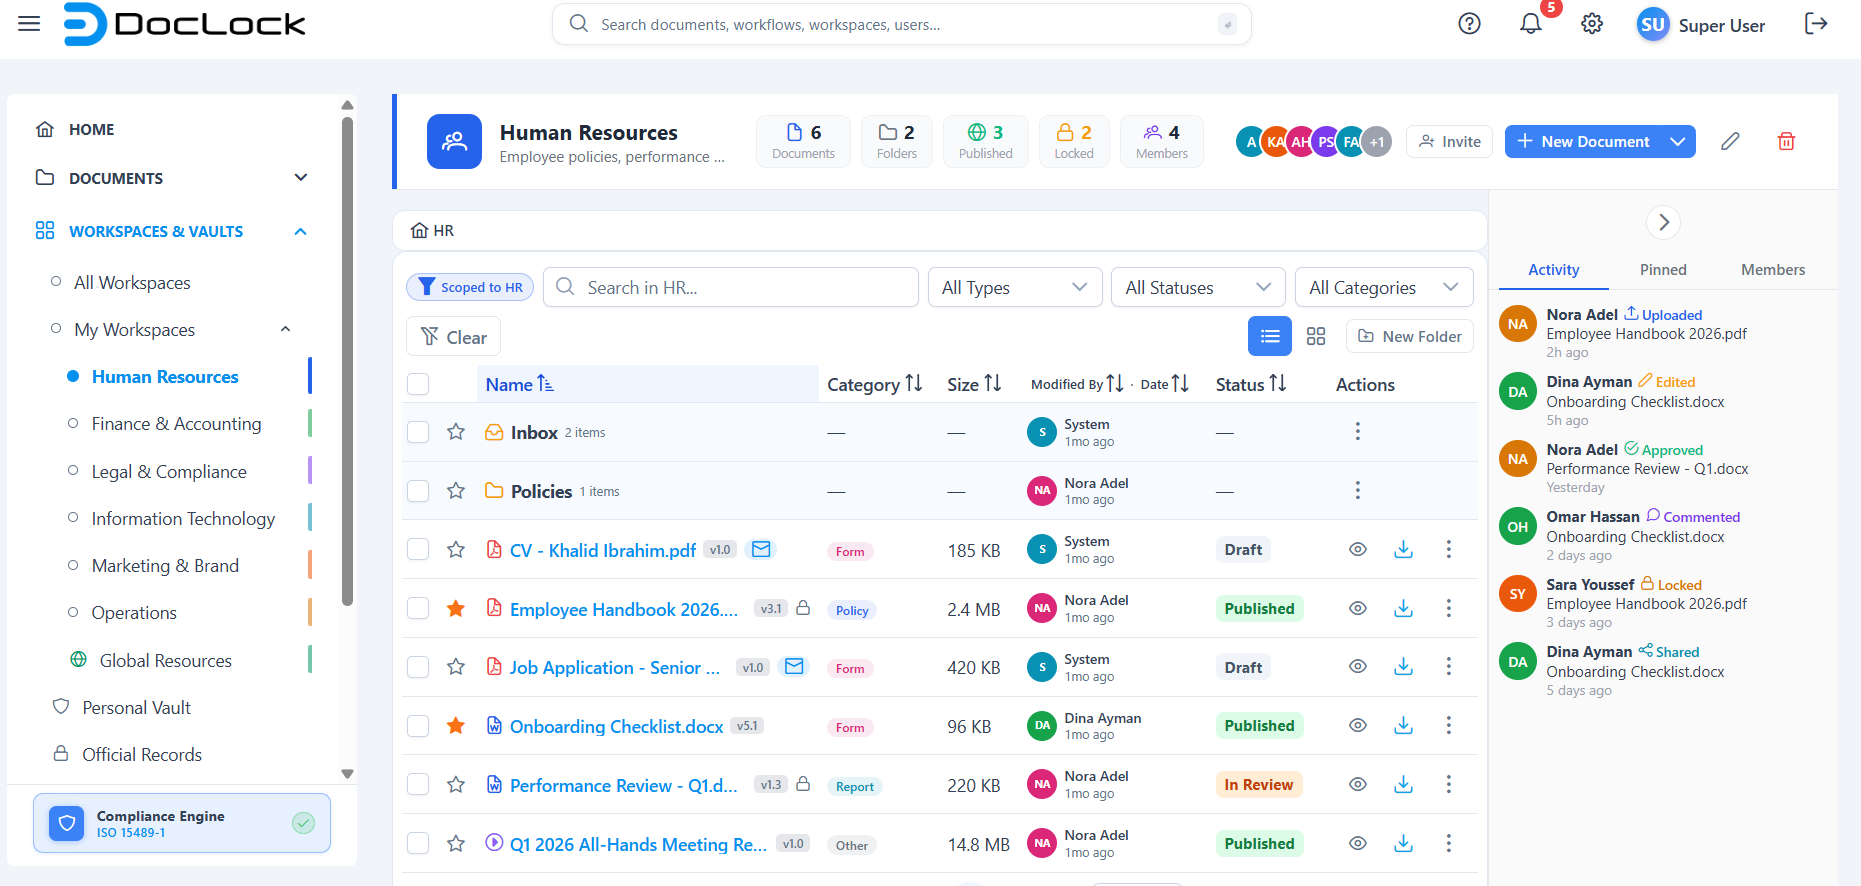
Tip: Your own private space is the Personal Vault (under Workspaces & Vaults). It's protected by a password prompt and isn't shared with anyone.
4. Open or upload a document
To open a document: click any file in a workspace or document list to open its detail view, where you can read it and see its versions, metadata, activity, and comments.
To upload a document:
- Inside a workspace, click New Document (top-right of the workspace header).
- Drag and drop your files onto the drop zone, or click browse to choose them — or pick Start from a Template to generate a document from an approved template.
- Finish the upload. The new file appears in the workspace and in its Activity feed.
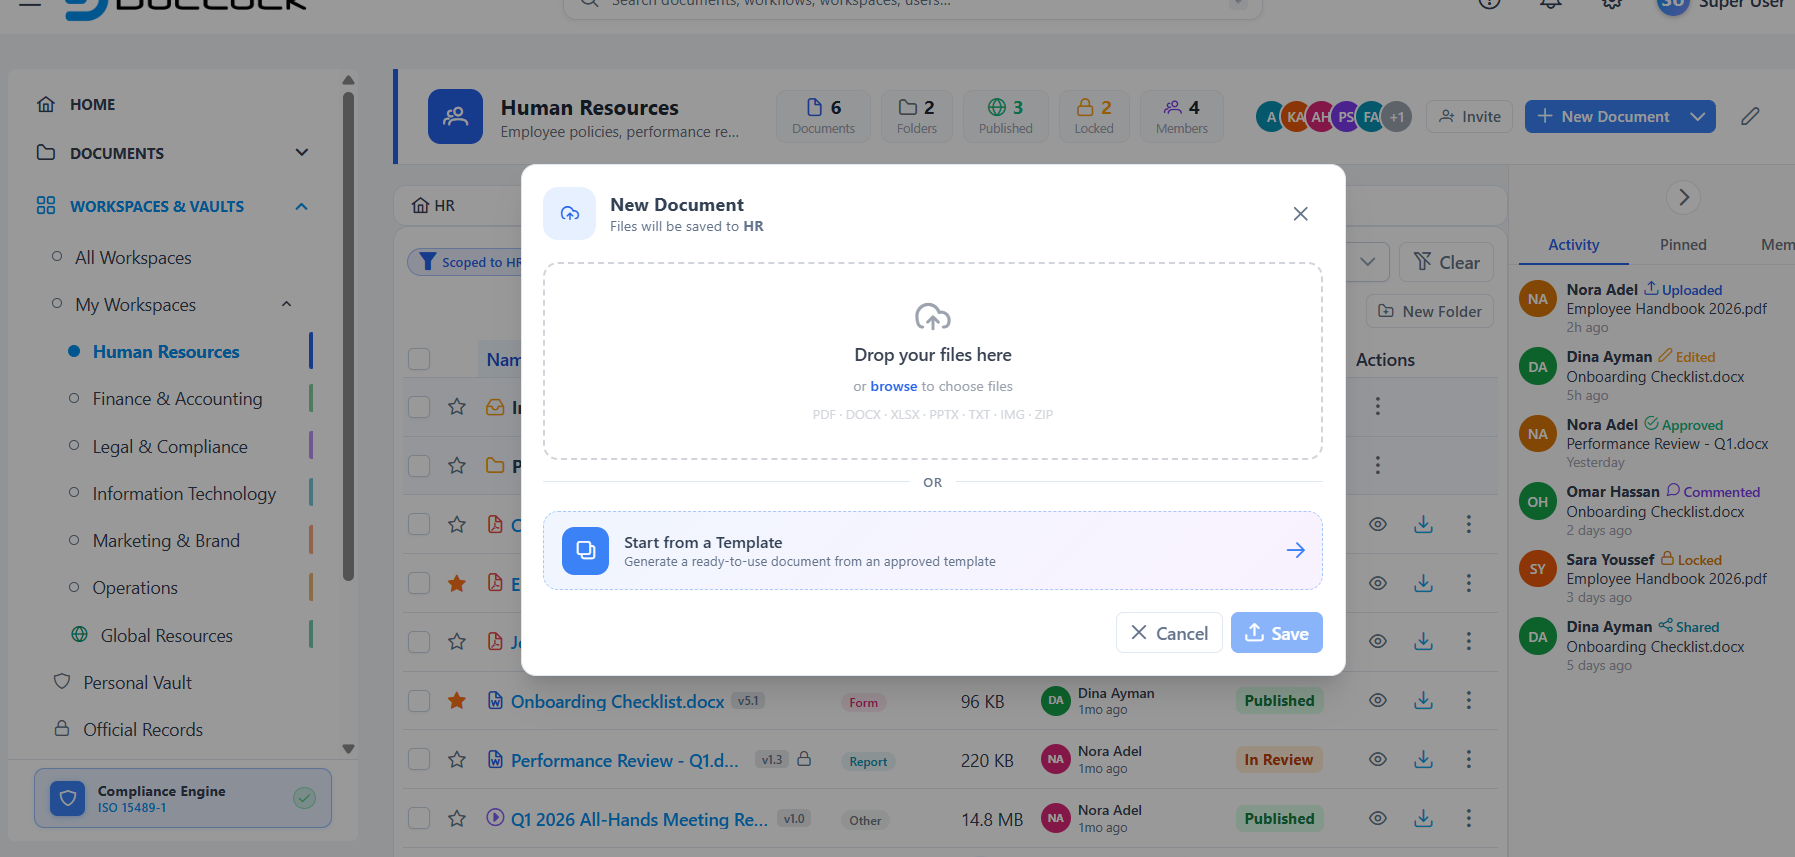
Note: The New Document button only appears if your workspace role allows uploading. Public workspaces (like Global Resources) are view-and-download only.
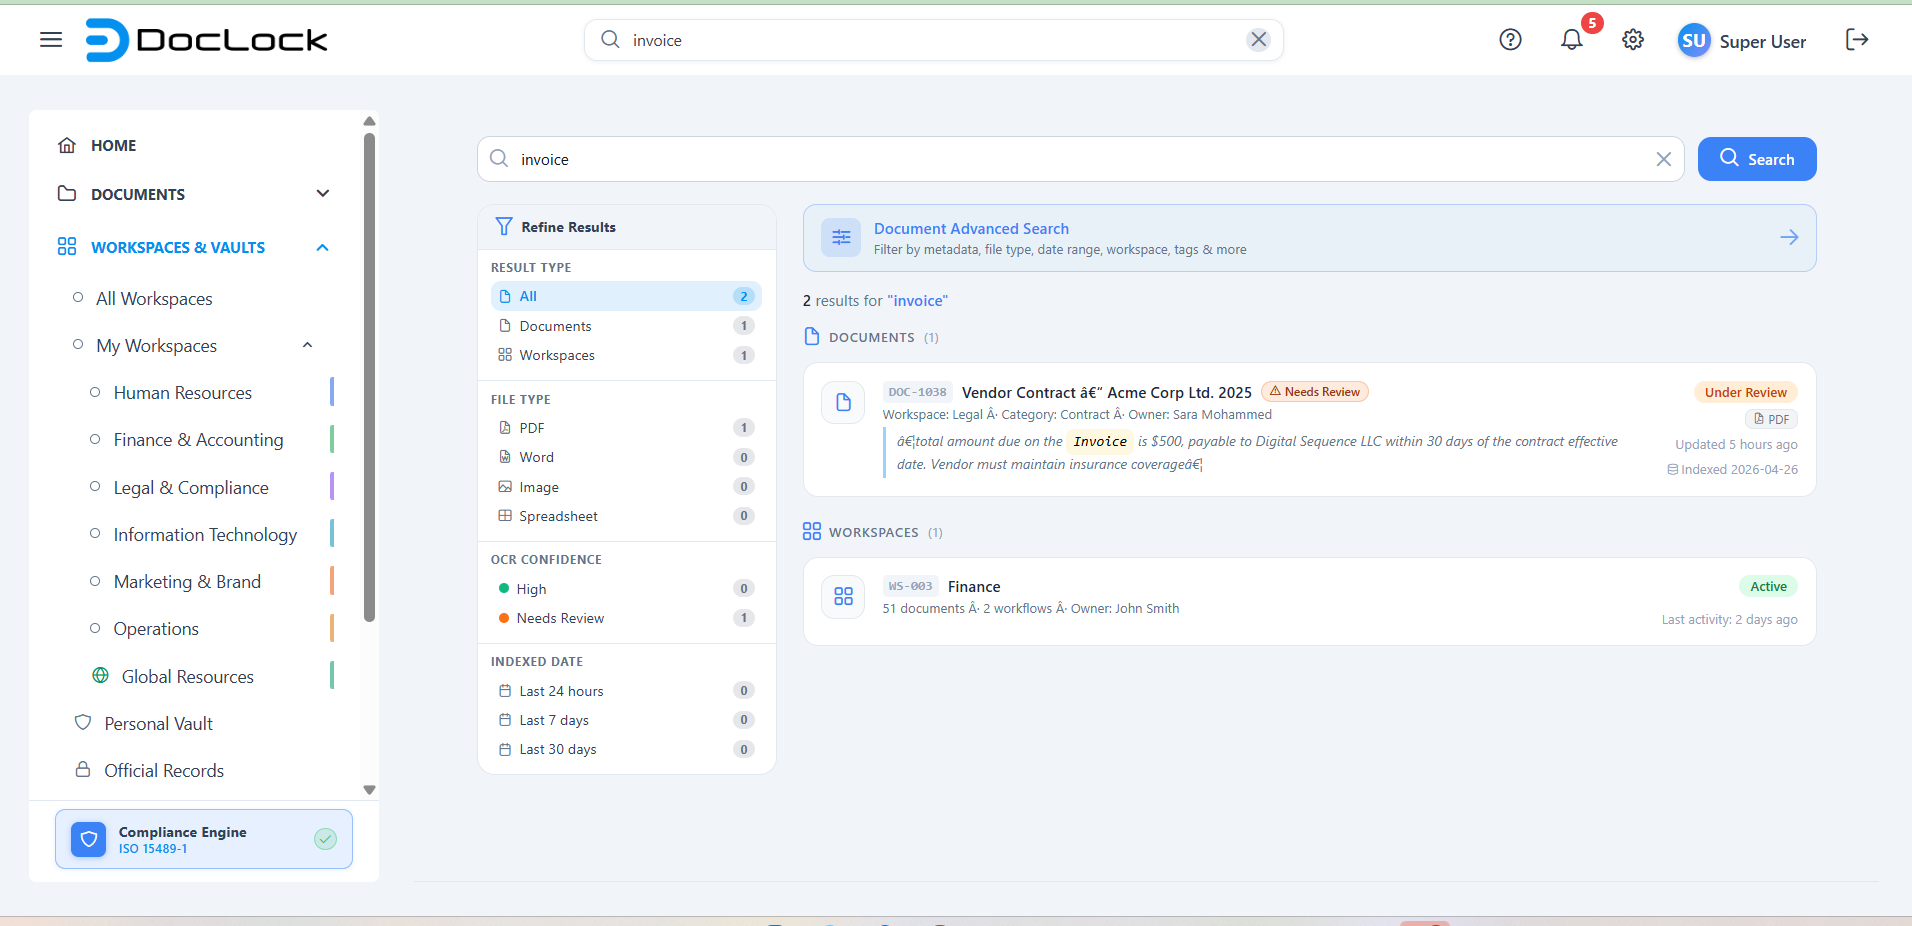
5. Find things with search
You don't have to remember where a document lives — just search for it.
- Quick search: click the search box in the top bar, type what you're looking for, and press Enter. You'll get a results page with documents, workspaces, workflows, and people, plus filters to narrow it down (by result type, file type, indexed date, and more).
- Advanced search: for detailed queries by metadata, tags, attributes, content, and workspace, open Document Explorer → Advanced Search.
You're ready
That's the core loop: sign in → open a workspace → open/upload a document → search. From here:
- Try a real task end-to-end in Your First Workflow.
- Personalize your account in Initial Account Configuration.