Inside a Workspace
When you open a workspace (by clicking a card on the All Workspaces page), you land on the workspace detail screen. This is where you actually work with that team's documents — browse folders, upload and open files, follow recent activity, and manage who has access.
How to open this screen
- From Document Explorer → Workspaces, click any workspace card.
- Access required: permission to view documents (
DOCUMENTS.VIEW). What you can do inside depends on your workspace role (see below).
If you open a workspace that doesn't exist, you'll see a "Workspace not found" message with a button to go back to All Documents.
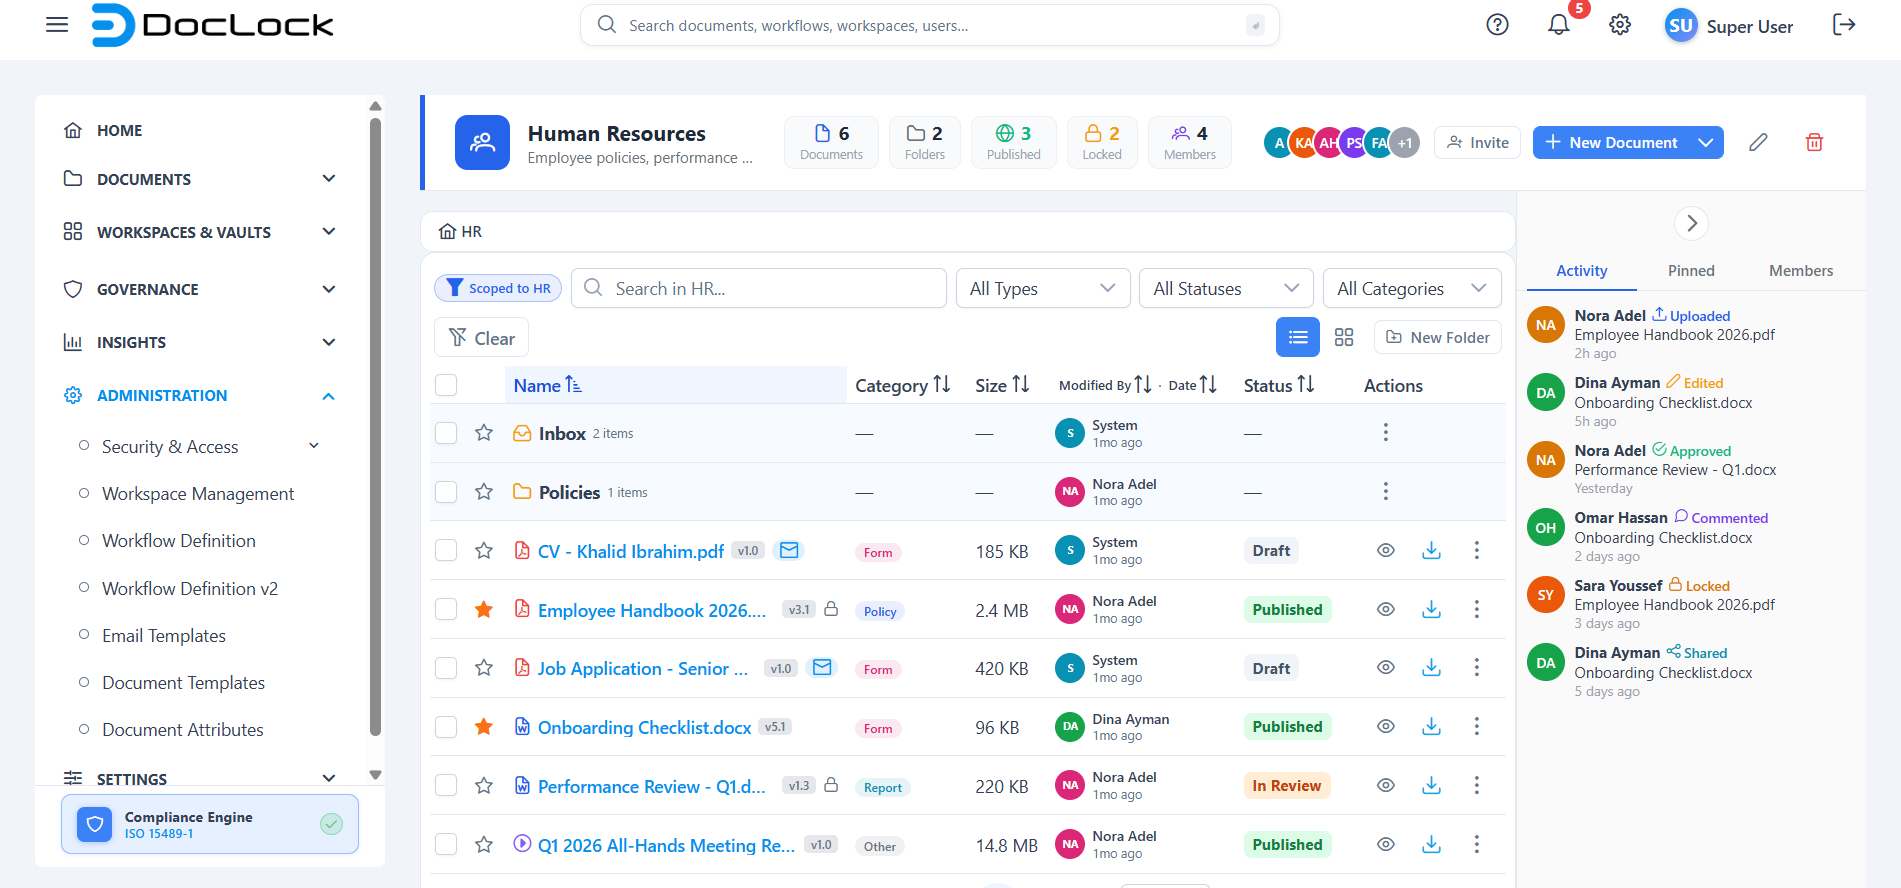
The workspace header
The colored bar at the top identifies the workspace and gives you quick stats and actions.
- Icon, name, and description — the workspace's identity. Public workspaces also show a green Public · Read-only badge.
- Stat counters — at-a-glance totals for the workspace:
- Documents — number of files.
- Folders — number of folders.
- Published — files that are published.
- Locked — files currently locked.
- Members — number of people with access.
- Member avatars — the first few members are shown as colored circles; a +N circle means there are more. The Invite button sits right beside the avatars so you can add a member quickly.
- Action buttons (shown based on your role):
- New Document — upload files or start from a template.
- Invite — add a member to the workspace (located next to the member avatars).
- Edit (pencil) — change the workspace's details.
- Delete (trash) — remove the workspace.
Note: Buttons like New Document, Invite, Edit, and Delete only appear if your workspace role allows that action. If you don't see a button, you don't have permission for it.
Browsing documents and folders
The main area is the document list for this workspace. From here you can:
- Open a folder to see what's inside, using the breadcrumb trail to navigate back.
- Open a file to view its details.
- See each file's version, type, status, and lock state in the list.
- Right-click a file for more actions, including Pin to Workspace (which adds it to the Pinned tab in the sidebar).
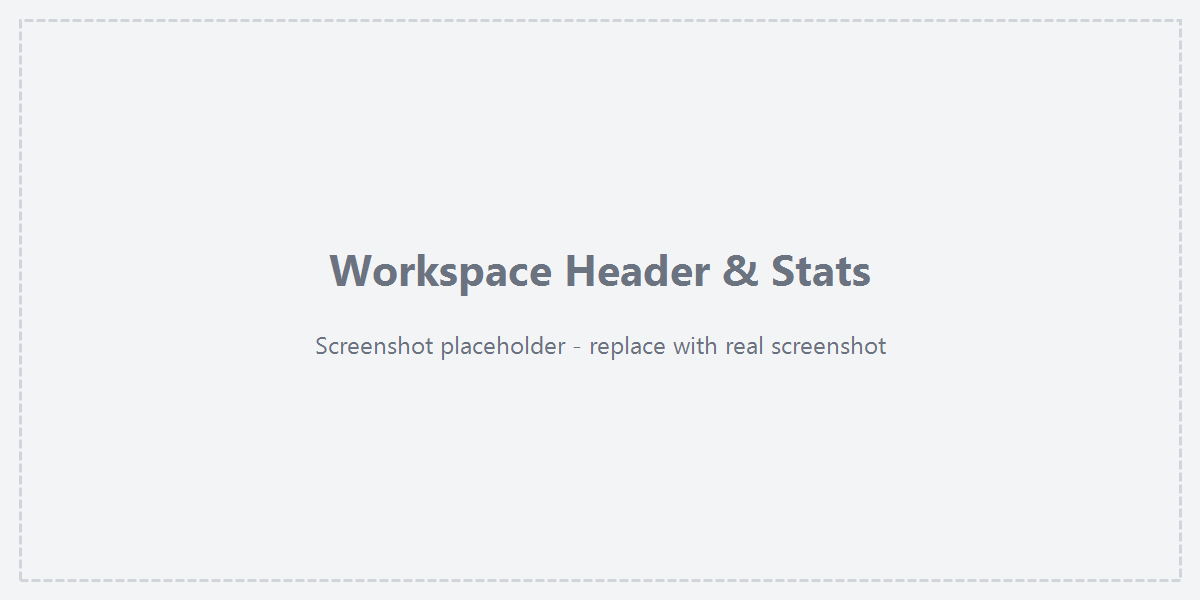
Adding a document
- Click New Document in the header (top-right).
- In the dialog, either:
- Drag and drop your files onto the drop zone, or click browse to choose them; or
- Choose Start from a Template to generate a new document from an approved template.
- Supported file types include PDF, DOCX, XLSX, PPTX, TXT, images, and ZIP.
- The dialog confirms the files will be saved to the current workspace. Finish the upload to add them.
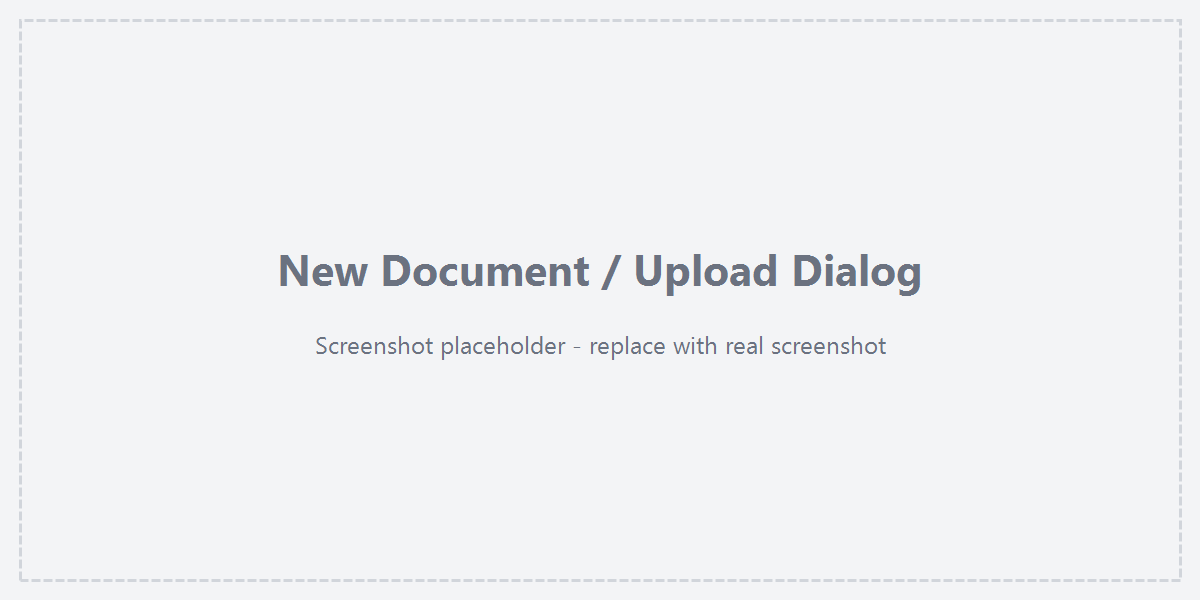
The right sidebar: Activity, Pinned, Members
A collapsible panel on the right has three tabs. Use the chevron button to collapse or expand it.
Activity
A live feed of recent actions in the workspace — uploads, edits, approvals, comments, locks, shares, and more — each showing who did it and when.
Pinned
Quick links to important files that have been pinned. To pin a file, right-click it in the list and choose Pin to Workspace. Use the pin button in the panel to unpin.
Members
Shows everyone with access and their workspace role. Your own role is shown in a banner at the top. If your role permits it, you can invite, edit roles, or remove members here.
Managing members
- Open the Members tab (or click Invite in the header).
- To add someone, click Invite Member, search for a user by name or email, choose their role, and click Add Member.
- To change a role, click the pencil next to a member, pick the new role, and save.
- To remove someone, click the trash icon next to their name.
Member management actions are only available to roles with the Manage Members permission.
Read-only (Global Resources) workspaces
If the workspace is the public Global Resources workspace, a notice explains that you can view and download files but cannot upload, edit, or delete. A Download All button is available instead of the editing actions.
Personal Vault
The Personal Vault is a special private workspace. When you open it, you're first asked to confirm your identity by entering your DocLock account password before its contents are shown. See the dedicated Personal Vault page for details.
Troubleshooting
| Problem | What to check |
|---|---|
| "Workspace not found" message | The link/ID is invalid or the workspace was removed; go back to All Documents. |
| You can't see New Document / Invite / Edit | Your workspace role doesn't include that permission; ask a workspace manager. |
| The workspace won't load | Use the Retry button on the error banner, or refresh the page. |
| A file you pinned isn't in Pinned | Confirm you chose Pin to Workspace from the file's right-click menu. |